| Ingredients: | |
| 1 tablespoon cooking oil 3 medium onions, finely chopped 2 bell peppers, finely chopped 2 celery stalks, finely chopped 3 garlic cloves, finely chopped 8 pounds coarse ground round steak (lean chili grind) 2 No. 2 cans Hunts tomato sauce 2 No. 2 cans Hunts stewed tomatoes 2 cans of Budweiser Beer 1 6 ounce can Hunts tomato paste 1 4 ounce can chile salsa 1 3 inch green canned hot pepper, finely chopped (only one chile from the can) 2 3 ounce bottles Gebhardt chile powder 1 4 ounce can green diced chile dash of oregano salt to taste (approximately 3 tablespoons) pepper (course ground) to taste garlic salt to taste | |
| Instructions: | |
| Put oil in a 10-12 quart pot. Add onion, bell pepper, celery and garlic cloves. Cook until onion is transparent. Add meat gradually, stirring until the redness disappears. Add the remaining ingredients, stirring after each addition. Lower heat and simmer 2½-3 hours. Stir frequently to prevent scorching. | |
| Servings: 12-16 | |
Welcome to the Pleasant Ridge BBQ Team blogspot. PRBBQ Team is a family professional BBQ Team from DeFuniak Springs, Florida. At PRBBQ we combine technology, skill, and innovation combine to produce award winning results in BBQ. Find us on FACEBOOK at Pleasant Ridge BBQ.
Sunday, November 28, 2010
Extreme Chili Recipe
Deer Sausage
Deer Sausage
2 lbs. ground venison
1 lbs. of Pork Sausage (Hot, Mild or Regular depending on your taste)
1 tsp. salt
1 tsp. pepper
1.3 cup of Old Plantation or other Sausage Seasoning
Combine all ingredients, make into patties and fry!

2 lbs. ground venison
1 lbs. of Pork Sausage (Hot, Mild or Regular depending on your taste)
1 tsp. salt
1 tsp. pepper
1.3 cup of Old Plantation or other Sausage Seasoning
Combine all ingredients, make into patties and fry!

Tuesday, November 23, 2010
Breakfast Fatty
Breakfast Fatty
Two packages of Jimmy Dean Sausage.
1 Can of Corn Beef Hash
Sharp Cheddar
Bacon
Place ground sausage in a container and mix together adding your favorite rub or salt and pepper to taste. Place the sausage in a 1 gallon zip lock bag and press until it spreads to all corners forming a square. Cut the zip lock down the sides exposing the top of the sausage square.
To the side, weave a bacon mat. Place the sausage on top of the bacon mat, remove the remaining side of the ziplock bag.
In the center of the sausage add corned beef hash and spread evenly. Top liberally with sharp cheddar cheese.
Gentle roll the sausage and bacon mat into a roll. Encase the ends by firmly forming into a loaf.
Top with rub seasoning.
Place on smoker at 250 (medium) and smoke until internal temp is at 165 (about 2 hours).
Slice and serve with eggs and toast!

 Pre cooked Fatty
See the finished product at out YouTube Video Channel : http://www.youtube.com/user/PleasantRidgeBBQ
Sunday, November 21, 2010
Southern Fried Gator Tail
SOUTHERN FRIED GATOR TAIL
1 egg
Salt to taste
Garlic salt to taste
Peanut Oil, enough for deep frying
1/2 tsp. Accent or Lowery's
1/2 to 3/4 c. milk
Pepper to taste
Flour
Gator tail
Gator tail is available locally at Thriftway Supermarket. Clean and wash the packaged meat. Cut meat into 4-inch pieces. Beat egg and milk together. Mix salt, pepper, garlic salt, Accent and flour together. Heat oil for frying. Dip gator tail into egg mixture and then into flour mixture and place into hot oil. Cook until golden brown.

Award Winning Ribs
First you have to trim the ribs. Start by removing the thin membrane on the backside of the rack. Take a butter knife loosen the membrane at the corner by placing the dull knife under the membrane. Once you a have a piece separated, use a small piece of paper towel to grip and pull against the ribs until the membrane is removed. This membrane prevents marinade and your rub from penetration the meat and is like elastic. Most people never remove this.
Now trim the diaphragm meat from the rib, that is that piece running down the center of the back that seems out of place. Trim it away as close to the ribs as possible. You can still cook and eat this as a sampler, but it takes away from your rack.
Know you need to soak the ribs in a marinade. A simple marinade is Dale’s with apple juice and a bit of mustard. Let them soak for at least 2 hours, but the longer the better and overnight is ideal.
Then remove from the marinade (pour marinade in a spray bottle), and pat dry with paper towel.
Coat with Olive oil and then apply your rub…there are several in the store, but I make my own…
Start your grill on smoke .. Place ribs on the grill for 4 to 5 hours on smoke. Use marinade in the spray bottle to spritz every hour for moisture.
Remove ribs and place in aluminum foil that has been coated with butter and honey or molasses. Place pretty side down, bones up . Close foil and put back on grill. Turn temp to 350 or Medium for 45 minutes. Unwrap and coat with your favorite BBQ Sauce and cook for 20 more minutes.
Take ribs off and let rest for 10-20 minutes & enjoy!

Cajun Injector Sauce for your Turkey
Start by making a Cajun Rub you can use year round...
Makes about 1 cup
1/4 cup coarse salt (kosher or sea)
3 tablespoons sweet paprika
2 tablespoons garlic powder
2 tablespoons onion powder
2 tablespoons dried thyme (preferably ground)
2 tablespoons dried oregano
1 tablespoon freshly ground black pepper
1 tablespoon freshly ground white pepper
2 teaspoons ground dried sage leaves
2 teaspoons cayenne pepper
Combine the salt, paprika, garlic and onion powders, thyme, oregano, black pepper, white pepper, sage, and cayenne in a small bowl and whisk to mix or place in a jar, cover it, and shake to mix. Store the rub in an airtight jar away from heat and light; it will keep for at least 1 year.
Now for the Injection Sauce:
1/3 cup chicken stock (preferably homemade), at room temperature
1 tablespoon bourbon (The good stuff, Maker's Mark is my favorite)
1 tablespoon your Cajun Rub (above)
Fill a kitchen syringe with the injector sauce. To do this, push the plunger all the way down, place the tip of the needle in the sauce, and slowly draw the plunger up: The syringe will fill with sauce. Inject the sauce into the turkey breast, thighs, and drumsticks. Don't be surprised if a little sauce squirts out; this is OK. Rub the outside of the turkey with the olive oil and sprinkle the remaining 2 tablespoons of Cajun Rub all over it, patting it onto the skin with your fingertips.Then go to the Traditonal Smoked Turkey recipe in our page and happy cooking!


Classic Smoked Turkey Recipe
For your Traditional Thankgiving Turkey Needs:
2. Make the brine. Place the salt and 1 quart hot water in a large deep pot and whisk until salt crystals are dissolved. Whisk in the cold water and maple syrup and add the onion, garlic, peppercorns, bay leaves, lemon zest, and cloves. The mixture should be no warmer than room temperature: if it's hot or warm, let cool. Add the turkey. Place a large zip top bag filled with cold water on top to keep the bird submerged. Place the turkey in the refrigerator and let marinate overnight.
3. Set up your grill/smoker for indirect grilling (use foil pan) and preheat to medium. If using a charcoal grill, place a large drip pan in center and toss the wood chips on the coals. If using a gas grill, place the wood chips in the smoker box or in a smoker pouch and preheat on high until you see smoke, then reduce the heat to medium. If using a smoker, light and set it up according to the manufacturers instructions and preheat to 275 degrees.
4. Place the turkey on the grate over the drip pan away from the fire. Brush with melted butter. Indirect grill until cooked, 2-1/2 to 3 hours. (Use an internal read thermometer to test for doneness-the turkey is ready when the thigh meat is 180 degrees.) If using a charcoal grill, replenish the coals and wood chips every hour. Baste the turkey with melted butter every hour. If the skin starts to brown too much, tent the bird with foil. On a kettle grill, you'll probably need to tent the sides closest to the piles of coals. If using a smoker, you'll need to cook the bird about 3-1/2 to 4 hours.
5. Transfer the turkey to a cutting board and let rest for 10 to 15 minutes before carving. Serve with the following gravy.
<span>Maple Red Eye Gravy</span>
Makes 3 cups
2. Melt the butter in a heavy saucepan. Stir in the flour and cook until a dark golden brown, 3 to 4 minutes.
3. Remove the pan from the heat and gradually whisk in the Madeira, coffee, cream, maple syrup, and the turkey drippings with stock. Return the pan to the heat and bring to a boil, whisking steadily. Simmer the sauce over medium heat until richly flavored and reduced to about 3 cups, 6 to 10 minutes. Correct the seasoning, adding salt and pepper to taste.

- 1 12 pound turkey
- 1-1/4 cups salt
- 1 quart hot water
- 4 quarts cold water
- 1 cup maple syrup
- 1 medium onion, thinly sliced
- 4 cloves garlic, peeled and crushed with the side of a cleaver
- 10 peppercorns
- 5 bay leaves
- 4 strips lemon zest
- 2 cloves
- 4 to 6 tablespoons melted salted butter
- Maple Red Eye Gravy (see below)
2. Make the brine. Place the salt and 1 quart hot water in a large deep pot and whisk until salt crystals are dissolved. Whisk in the cold water and maple syrup and add the onion, garlic, peppercorns, bay leaves, lemon zest, and cloves. The mixture should be no warmer than room temperature: if it's hot or warm, let cool. Add the turkey. Place a large zip top bag filled with cold water on top to keep the bird submerged. Place the turkey in the refrigerator and let marinate overnight.
3. Set up your grill/smoker for indirect grilling (use foil pan) and preheat to medium. If using a charcoal grill, place a large drip pan in center and toss the wood chips on the coals. If using a gas grill, place the wood chips in the smoker box or in a smoker pouch and preheat on high until you see smoke, then reduce the heat to medium. If using a smoker, light and set it up according to the manufacturers instructions and preheat to 275 degrees.
4. Place the turkey on the grate over the drip pan away from the fire. Brush with melted butter. Indirect grill until cooked, 2-1/2 to 3 hours. (Use an internal read thermometer to test for doneness-the turkey is ready when the thigh meat is 180 degrees.) If using a charcoal grill, replenish the coals and wood chips every hour. Baste the turkey with melted butter every hour. If the skin starts to brown too much, tent the bird with foil. On a kettle grill, you'll probably need to tent the sides closest to the piles of coals. If using a smoker, you'll need to cook the bird about 3-1/2 to 4 hours.
5. Transfer the turkey to a cutting board and let rest for 10 to 15 minutes before carving. Serve with the following gravy.
<span>Maple Red Eye Gravy</span>
Makes 3 cups
- 2 cups turkey drippings
- 1 to 2 cups chicken or turkey stock
- 3 tablespoons butter
- 3 tablespoons flour
- 1/4 cup Madeira wine
- 1/4 cup coffee
- 1/4 cup heavy cream
- 2 tablespoons maple syrup
- coarse salt (kosher or sea) and freshly ground black pepper to taste
2. Melt the butter in a heavy saucepan. Stir in the flour and cook until a dark golden brown, 3 to 4 minutes.
3. Remove the pan from the heat and gradually whisk in the Madeira, coffee, cream, maple syrup, and the turkey drippings with stock. Return the pan to the heat and bring to a boil, whisking steadily. Simmer the sauce over medium heat until richly flavored and reduced to about 3 cups, 6 to 10 minutes. Correct the seasoning, adding salt and pepper to taste.

London Broil
Tonight, I decided to try a London Broil on the Traeger for dinner. Marinaded in solution of Dales, Mustard (1teaspoon), Apple Juice and a shot of bourbon. After marinade I covered it with olive oil and then rubbed with a combo of blackening seasoning, Lawry's seasoned salt, paprika, and garlic powder.
Smoked on medium heat 200-250 for hour then finished at high for 45 min. Cory and Tammy like beef rare, so I planned to pull it when the internal temp reached 120. Then let it rest for 20 minutes and cut with the grain into thin slices.

Smoked on medium heat 200-250 for hour then finished at high for 45 min. Cory and Tammy like beef rare, so I planned to pull it when the internal temp reached 120. Then let it rest for 20 minutes and cut with the grain into thin slices.

Smoked Peanuts
Thanks to Monika for this recipe suggestion. We plan on trying this out soon and will post the results.
Smoked Peanuts Ingredients
(2 cups) plain uncooked peanuts
(1/2 c) hot pepper sauce
peanut oil
salt to taste
Preparation: Combine peanuts with hot sauce in a small bowl, let stand for about 30 minutes. Thickly coat a 23 cm x 33 cm (9” x 13”) glass or ceramic baking dish with peanut oil. Add the peanuts, stir and spread to a single layer. Sprinkle with salt.
Smoking Method: Preheat the Smoker to around (200°F). Place baking dish with peanuts on the top rack of the smoker and using Mesquite flavor bisquettes/chips roast until peanuts are browned and dry approximately 50 to 60 minutes. Transfer peanuts to absorbent paper to cool. Serve immediately or keep in a covered jar for several days.
Smoked Turkey Recipe
Thaw the bird and soak in a salt water brine. Inject the bird for moisture, especially the breast. Generously rub your favorite BBQ seasoning all over the bird. Get your smoker up to temperature and if using charcoal add some hickory chunks to the coals. For the Traeger its Hickory pellets.
Smoked turkey at about 230º for about 9 hours. Place in an aluminum tray, wrapped them in foil and wait until the family arrives!
Gravy: find a way to get some pan drippings from the smoked bird and make the gravy. This is one advantage of doing an oven roasted bird.
BBQ Sauce: consider offering some as a condiment to the smoked bird. This seems a bit odd, but it may be the perfect addition to your Thanksgiving Day table.

Grilled Sweet Potato Fries
Grilled Sweet Potato Fries
Ingredients:
Directions:
Pre-heat your grill to medium-hot.
Mix all ingredients together. Make sure sugar is some what dissolved with no clumps of sugar.
Grill potatoes on all sides until done. About 15 minutes.
Serve immediately.

Ingredients:
- 4 sweet potatoes or yams, peeled and cut into “fries”
- 1/4 cup cilantro or any other fresh herb, finely chopped
- 1/2 cup brown sugar, packed
- 1/2 cup olive oil
- Kosher/Sea Salt
- Pepper
Directions:
Pre-heat your grill to medium-hot.
Mix all ingredients together. Make sure sugar is some what dissolved with no clumps of sugar.
Grill potatoes on all sides until done. About 15 minutes.
Serve immediately.

Pleasant Ridge Vinegar Based Sauce
This week's college football gameday menu at the Alabama Crimson Tide visits Duke is Carolina Pulled Pork Sandwiches. Carolina style BBQ requires a vinegar BBQ Sauce. Here is a great recipe to make your pulled pork extraordinary:Ingredients
2 cups cider vinegar3 tablespoons ketchup2 tablespoons paprika2 tablespoons brown sugar4 teaspoons kosher salt1 tablespoon hot sauce1 teaspoon cayenne -- (1 to 2 to taste)1 teaspoon ground black pepper -- (1 to 2 to taste)
Preparation
Combine all the ingredients in a nonreactive mixing bowl, mixing until the sugar and salt dissolve. Taste for seasoning, adding pepper as needed.
Transfer to a clean, sterile Mason jar and refrigerate. This vinegar sauce will keep for several months.


Some Like it HOT! Top Ten HOT BBQ Sauces
Traditional barbeque sauces have a perfect blend of sweet, sour and spicy flavors, but a recent trend shows that people like their bbq with a dash or more of hot barbecue sauce. As always, the base continues to be tomato but now the hot barbecue sauce has a hot, spicy flavor that lingers hours after you have had your share of a bbq.
Based on hot peppers of the capsicum family such as chilly peppers, red peppers, tabascos, habaneros and paprika, each hot barbecue sauce smells and looks as good as it tastes. The heat index of a hot pepper sauce depends on its hot pepper ingredient.
Here are the top 10 favorite hot barbecue sauces:
Mad Dog Ultra Hot – David Ashley uses only the best ingredients in this world famous sauce from Boston. He added plenty of heat to this one.
Jake's BBQ Sauce – Inferno – This sauce is hot and scrumptious. There is no escaping from heat of habanero peppers and jalapeno peppers. Daring if you are, get to the bottom of Jack's BBQ Sauce - Inferno.
Sticky Fingers Habanero BBQ Sauce – The barbeque sauce, is a winner all the way – winning hearts of customers Sticky Finger’s took their Memphis Original Barbecue Sauce and turned up the heat with habenero and other peppers for a kicked up flavor sure to please chili heads everywhere!.
Worlds Most Dangerous BBQ Sauce – A real treat for the ultimate barbecue experience, this pepper sauce has pure honey and natural maple flavor added to it for a perfectly mouth-watering recipe.
Big Bob Gibson – Red Habanero BBQ Sauce is a perfect head-turner. Perfectly complimenting the flavors of all broiled meat, the Big Bob Gibson has been a National Award Winning BBQ sauce for many years.
Habanero BBQ Sauce From Hell – A hot barbecue sauce promising an outlandish experience, it is a perfect condiment and a barbecue blaster.
Pappy's XXX White Lightnin’ BBQ Sauce – Another barbequeue sauce of the hot genre, it makes for a wholesome experience – ranging from an initial sweet taste to an intermediary sourness followed by the distinct habanero fire. You cannot just stop falling in love with this hot barbecue sauce even after your nose starts running and your eye starts watering.
Scorned Woman Fiery BBQ Sauce – You know what they say "Hell hath no fury like A scorned woman". This sauce is hot and delicious.
HillBilly Home Brew BBQ Sauce - Hillybilly Home Brew BBQ Sauce is a thick and delicious BBQ sauce straight from Louisianna. It is hot enough with a special concoction of hot peppers and spices.
Jack Daniels BBQ Sauce - Hot and Spicy! - This family recipe was created around the turn of the century, almost five generations ago. The old folks wanted a distinctive flavor and realized that local Tennessee whiskey was the answer.

Smoked Brisket Recipe!
This traditional Texas-style Beef Brisket recipe will produce a great piece of smoked meat. This basic recipe gives you all you need to know to smoke a brisket. From here you can learn to take your brisket to a whole new level.
Ingredients:
Preheat smoker and add wood chips (follow your instruction manual). Clean and dry the brisket. Apply chili rub. Place brisket in smoker for approximately 8-10 hours or until the internal temp reaches 160 degrees. Keep the smoker temperature at about 220 degrees F. To increase tenderness, take the brisket out of the smoker, wrap in aluminum foil and place in oven at 180-200 degrees for the last two hours. Typically after 8-10 hours a piece of meat will have absorbed as much smoke as it can and additional smoking may impart a bitter flavor.

Ingredients:
- 8-10 pound untrimmed brisket
- 1/2 cup chili rub
- wood chips/pellets (oak, fruit wood, hickory)
Preheat smoker and add wood chips (follow your instruction manual). Clean and dry the brisket. Apply chili rub. Place brisket in smoker for approximately 8-10 hours or until the internal temp reaches 160 degrees. Keep the smoker temperature at about 220 degrees F. To increase tenderness, take the brisket out of the smoker, wrap in aluminum foil and place in oven at 180-200 degrees for the last two hours. Typically after 8-10 hours a piece of meat will have absorbed as much smoke as it can and additional smoking may impart a bitter flavor.

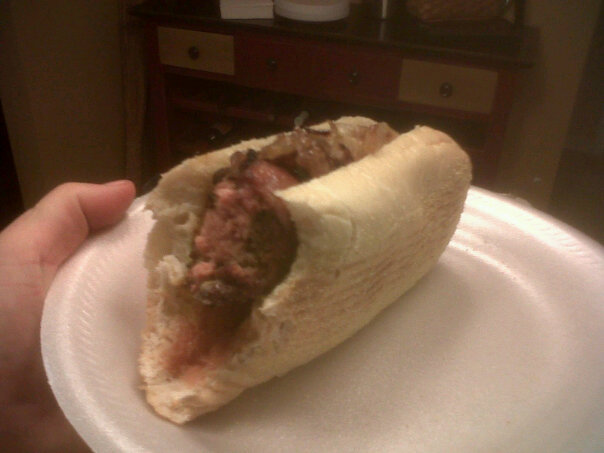
Bacon Burger Dogs! A great College Football Season recipe
Bacon Burger Dogs
Bacon Burger Dogs were discussed at length on "The Cosby Show" in the 80's. While we never saw Cliff and Theo Huxtable eating Bacon Burger Dogs, the concept was so impressive we have come up with our own version. You may want to consult your cardiologist or have a defibulator device on hand for this one.
Time Required: For prep, it takes a while the first time you make them; allow an hour for 15 BBD's. After that you get the hang of it. Cooking time is 20-20 minutes.
Ingredients:
- About 6-8 ounces of ground beef per Bacon Burger Dog (BBD)
- One top-notch hot dog per BBD; use long-and-narrow dogs, not the shorter and plumper variety
- Two strips of bacon per BBD
- Sub/hoagie roll
- Ketchup and/or mustard; this is up for debate and depends on personal preference. While hot dogs generally call for mustard-only, and hamburgers ketchup-only, many feel that the BBD can handle both. Many also feel the BBD requires no condiments or possibly only chili or chopped onions. Please excuse me for rambling, but this important topic deserves our time and consideration.
- Grab a handful of ground beef and spread it out flat in the shape of a square that is not as long as your hot dogs; you want about 6-8 ounces per BBD
- Place a hot dog on the beef and roll it up
- Press the beef together so the hot dog is wrapped up; the ends of the dog should stick out
- Wrap the burger/dog combo in two strips of bacon, so that the bacon runs diagonally around the Burger Dog
- Grill for 20-30 minutes over medium heat; you want the beef to cook without burning the bacon.
- Serve on a Hogie Roll


Football means Brats!
One sure-fire way to make certain all your guests get a piping hot, juicy Brat is to create a simple bratwurst hot tub.
Brat Hot Tub Ingredients
Put the pan right on the grill, pour in the beers and add the butter and onions. Then grill your Brats to a juicy, golden-brown perfection. Serve immediately to your hungry guests and place any remaining brats into the steaming hot tub. When folks are ready for seconds or thirds--or when stragglers show up late - grab a Brat out of the hot tub and enjoy!

Brat Hot Tub Ingredients
- One 11 x 9 x 2 3/8 inch aluminum foil baking pan
- 2 - 3 beers
- 2 Tbsp. butter
- 1 medium yellow or white onion, sliced
Put the pan right on the grill, pour in the beers and add the butter and onions. Then grill your Brats to a juicy, golden-brown perfection. Serve immediately to your hungry guests and place any remaining brats into the steaming hot tub. When folks are ready for seconds or thirds--or when stragglers show up late - grab a Brat out of the hot tub and enjoy!
Citrus Grilled Pork Chops
Most of us enjoy a nicely grilled and tender pork chop right off the grill. Full of great flavors and a subtle hint of smoky flavors. If you would like some smoke flavor added to your meat, may we suggest using apple, maple, cherry or pear wood chips. Simply soak the chips for 30 minutes in apple juice, drain, wrap in aluminum foil or use a smoker box and add them to your heat source. Once they begin to smoke, begin cooking your chops. Nice! Try this great "change-up" from the regular routine of grilled pork chops. It will add a great new twist to an already great grilled meat.
6 (1/2-inch-thick) boneless pork chops1/3 cup olive oil1/4 cup fresh lime juice2 Tbs chopped fresh cilantro1 garlic clove, minced1/4 tsp dried hot red-pepper flakes
Note: If the red-pepper flakes are too hot for you, try using 1to 2 Tbs of fresh ground black pepper
Take your lime juice, garlic, red-pepper flakes, and 1/4 tsp salt, and combine them thoroughly. Next, add your olive oil slowly, stirring well. Now whisk in cilantro.
Prepare your grill for direct-heat (i.e. grilling) cooking over medium-high heat. Rinse and dry the chops and season with salt and pepper. Oil grill rack, then grill pork chops, covered, turning over once, until just cooked through, 5 to 6 minutes total. Serve drizzled with some vinaigrette, and with remainder on the side.
Ice Tea BBQ Sauce....Seriously!
The history of barbecue have seen some pretty strange sauces. This one may seem over-the-top, and yet, canned iced tea has a lot in common with the flavor profile of a good barbecue sauce. It's sweet. It's tart. It's earthy and aromatic. What more could you ask for? Think of the bragging you'll get to do the next time someone admires this sauce and asks you what's in it.
3/4 cup canned iced tea (reserved from Iced Tea Chicken)
3/4 cup ketchup
2 tablespoons Worcestershire sauce
2 tablespoons A.1. steak sauce
2 tablespoons brown sugar, or more to taste
1 tablespoon fresh lemon juice, or more to taste
1/2 teaspoon liquid smoke 1/2 teaspoon onion powder
1/2 teaspoon garlic powder
1/2 teaspoon freshly ground black pepper
1. Combine the iced tea, ketchup, Worcestershire sauce, steak sauce, brown sugar, lemon juice, liquid smoke, onion and garlic powders, and pepper in a heavy saucepan with 1/4 cup of water and gradually bring to a boil over medium-high heat.
2. Reduce the heat to medium to obtain a gentle simmer. Let the sauce simmer gently until slightly reduced, thick, and richly flavored, 6 to 8 minutes. Taste for seasoning, adding brown sugar or lemon juice as necessary; the sauce should be highly seasoned. If sauce is too thick or intense, thin with a little more water.
3. Transfer the sauce to a bowl or clean jar and let cool to room temperature before serving. Any leftover sauce (in the unlikely event that you have it) will keep in the refrigerator, covered, for several weeks. Let return to room temperature before serving.
Makes about 2 cups
Common BBQ Mistakes
7 Common Mistakes in BBQ:
1. An early BBQ mistake is not starting with meat that is totally thawed. If it's still slightly frozen in the middle, your meat will end up undercooked. Because of the low temperatures in the middle, your meat will look perfect on the outside and still be too raw inside.
2. Try to avoid lighter fluid if you are cooking on a charcoal grill. The chemical flavor will really change the taste of your food. Instead, use an electric starter or a chimney. You'll be able to tell a big difference right away.
3. The next big BBQ mistake is when you put your meat on. It's important to cook at the right temperature. Hot and fast is not best for BBQ. To get the best smoke flavor and tender meat, it's best to cook long and slow. Except for steaks that need searing, medium heat is best.
4. If you are using specialty wood, make sure it's aged. Using green wood will leave a bitter creosote coating on all your meat -- very unappetizing!
5. Put the lid down and leave it alone! A common BBQ mistake is to keep lifting the lid to check the meat. Every time you open the lid, you drop the temperature in your grill. Relax. It's not going anywhere.
6. If you use sauces or mops while your meat is on the grill, make sure it does not contain any sugar. Sugar burns at a low temperature and will burn onto the meat. Also unappetizing.
7. The last BBQ mistake is to use the same plate or platter to carry the food back into the house. This is a food safety issue -- nothing like food poisoning to ruin a party! Always use a clean platter.

Quick Tip -Remove the Ashes!
Always remove the ashes from you grill or smoker as soon as possible. While the ashes themselves pose no particular problem, the problem comes in when they become moist/damp/wet. When water combines with the ashes, it creates a very corrosive compound capable of eating through most anything. Your equipment will last much longer when properly taken care of. See our fun video on cleaning your grill for more information.
Vinegar based BBQ sauce - Georgia Style
Inspired by our recent trip to Georgia, and a sampling of the vinegar based sauces at Angels BBQ in Savannah, here is a note with recipes for our friends. A vinegar based bbq sauce... nothing compares to the flavor and the tenderness it imparts to a juicy piece of meat, at least that what they say in Georgia.
These sauces are typically apple cider vinegar and pepper based, as opposed to mustard or tomato based sauces which are more popular in areas like South Carolina and Texas.
You can use these vinegar based bbq sauces as a marinade. Just cover and soak the meat in them to add flavor and tenderize before cooking.
They can also be applied during cooking but only during the last hour of cooking so as not to burn the sugar ingredients in them.
Or if you prefer, you can just add these sauces directly to the meat once it's cooked. It's best to warm up the vinegar sauce first before applying, so that you don't cool down the piping hot meat.
So next time you're barbequing, try out one or all three of these typical, mouth watering vinegar barbeque sauce recipes, one hot, one milder and one sweet.
Don't forget, you can experiment with the amount and type of bbq ingredients and discover what works best for you.
Vinegar based BBQ Sauce #1 (Hot)
1 cup (250 ml) apple cider vinegar
1 teaspoon crushed red pepper flakes
1/2 teaspoon cayenne pepper
1 teaspoon salt (or to taste)
1 tablespoon brown sugar or 1/2 tablespoon black molasses
Add all the ingredients to a bowl and mix well.
To really bring out the flavors, let the mixture stand for 4 hours before using.
--------------------------------------------------------------------------------
Vinegar based bbq Sauce #2 (Milder)
1 cup (250 ml) apple cider vinegar
1/2 teaspoon crushed red pepper flakes
1/2 teaspoon tabasco sauce
1 teaspoon black molasses
Add all the ingredients to a bowl and mix well.
--------------------------------------------------------------------------------
Vinegar based bbq Sauce #3 (Sweet)
1 cup (250 ml) apple cider vinegar
1 tablespoon crushed red pepper flakes
1 tablespoon ground black pepper
1 teaspoon salt (or to taste)
3 tablespoons ketchup
1/3 cup (75 ml) honey
Add the vinegar, both peppers and the salt to a saucepan and stir well.
Bring to a boil then mix in the ketchup and honey and reduce the heat to low.
Allow the mixture to simmer for 30 minutes.

Are my ribs ready yet?
How do you to tell if the ribs are ready. Take one slab of spareribs and one slab of baby back ribs and put them both in the smoker. When the baby backs are dry, the spareribs are done.
OK...just kidding. That's a bit extreme. But it underlines how hard it is to tell when ribs are ready. That's because ribs come in so many different weights and thicknesses. Not to mention the fact that keeping an outdoor oven at a precise temp is tricky. So here are some guidelines and techniques for telling when they are done.
Ribs should not fall off the bone!
Properly cooked ribs will not not not fall off the bone! The only ribs that fall off the bone are ribs that have been boiled and steamed and that process usually robs them of flavor because water is a solvent. Steamed and boiled ribs usually have a mushy texture. Properly cooked ribs will pull cleanly off the bone with your teeth, but they will still have some resilience and chew, like a properly cooked steak, but not be tough.
How to tell when they are ready
THE TIME/TEMP TEST: Every smoker is different and every slab of meat is different, so exact cooking time can vary depending on a number of variables. The goal is to get the meat to 180°F and keep cooking for about 30 minutes. To do that, I think the ideal cooking temp is about 225°F, hot enough to brown the surface and develop a bit of a bark, but not so hot that a lot of moisture evaporates.
On most cookers, when the oven temp is 225°F, it takes about three hours to cook a slab of baby backs and about five hours to cook a slab of St. Louis cut ribs or spares. They are slightly undercooked at that stage. I then put the sauce on and sizzle it in on a hot grill for about 10 minutes per side. See The Big Finish Video. This finishes the cooking. If you skip the sizzling step, add another 30 minutes of cooking time at 225°F. At higher cooking temperatures decrease the cooking time. For example, at 325°F, baby backs are done in only 90 minutes. At higher altitudes, increase the cooking time 20% or more. The key here is to keep the cooking temp under control, and that is the barbecue chef's craft.
That said, it should be noted that each slab is different, and some can take a good bit longer.
THE BEND TEST. This is the method I like best. I pick up the slab with a pair of tongs and bounce them slightly. If they are ready, the slab will bow until the meat starts to crack on the surface.
THE TWIST TEST. Another technique is to grab ahold of the tip of a bone somewhere near the middle. If you twist, it should start to break free of the meat. This means the collagens in the tough connective tissues have melted and turned to gelatin.
THE POPUP TEST. A lot of books and websites say to wait until the meat begins to pull back from the tips of the bones, exposing about 1/4" of bare bone. Some folks call this the natural popup thermometer. Problem is that this is not necessarily a sign that they are ready. Heat can cause this shrinkage. Put ribs on a hot grill and they will shrink within an hour, but they won't be done. On the other hand, if you keep the temp under 250°F, by the time the meat pulls back, it is overcooked.
PEEK A BOO TEST. If you are unsure if the meat is ready, you can cut into it and sneak a peek. The meat in the center should be white and there should be no pink juices. Remember, if you have cooked with smoke, there will probably be pink meat near the surface, but the meat in the center should be white or tan.
THE TAST TEST. Some cooks pull one bone off the end, look at the meat, and then taste it. This works fine, especially because you get to eat the rib you removed! Problem is when the meat is not ready. Then you have to pull off another bone. Then another. Then there's nothing for the guests.
THE TOOTHPICK TEST. You poke a toothpick into the meat between the bones. When it slides in with little or no resistance you have a done rack of ribs. It's best to test various parts of the rack to be sure you have them done to your liking. With a little practice you can better judge the doneness of your ribs than the bend test.
THE THERMOMETER TEST. One way to tell if they're ready is with a digital instant read thermometer with a thermocouple and a really thin probe like the Thermoworks ThermaPen. Not all thermometers are reliable. A thermocouple thermometer works pretty well, but it is tricky. You need to poke the meat in several locations because it will be different temperatures next to the bone, midway between the bones, and on the ends.
Enjoy!

Boston Butt - Pulled Pork Recipe

Yellow mustard (secret ingredient)
Rub Ingredients:
1 Cup Brown Sugar
1/2 Cup Paprika
3 Tablespoons Smoked Paprika
2 Tablespoons Coarse Pepper
2 Tablespoons Coarse Salt
2 Tablespoons Onion Powder
Mop/Marinade Ingredients -Equal parts:
Apple Juice
Apple Cider Vinegar
Pineapple Juice
The night before rub mustard over the pork and rub in the rub mixture. Wrap in plastic wrap and refrigerate over night. The next day bring smoker to 225º If cooking with charcoal add apple or hickory wood to the coals and place pork on top grill. (or in oven or grill set for indirect heat). Monitor heat and keep it around 225º until pork reaches 185º to 195º internal temp. This will take 1 1/2 to 2 hours per pound. Depending on the size of your butt this could take all day. About once an hour spray or mop your butt with the mop mixture. Remove pork and let cool for 30 minutes. Pull apart with fingers or forks and serve on soft buns with your favorite BBQ sauce and coleslaw.
For 'real' BBQ flavor this should be cooked in a BBQ smoker but if you don't have one this can easily be done in your oven or crock pot. You won't get the same slow smoked BBQ flavor but it will still be good. For the oven place you butt on a rack in you roasting pan, pour plenty of the mop in the bottom and cover. Roast at 250º until pork reaches 185º to 195º. (Check periodically you may need to add more liquid to the pan.) In the crock pot add 2 cups of mop and let it cook all day until it pulls apart easily. Be sure to drain any fat.
Grillin Pizza...that's right PIZZA!


Grilled pizza makes a perfect appetizer for a barbecue party. As it is always a good idea to feed your guests something before the big event, they can sip on drinks while enjoying small pizza slices hot off the grill. You will notice how it keeps the curious from opening the grill lid while the main dish is being cooked later on.
With the Treager Wood Pellet Grill the process is as simple as place on high for 20 minutes, as it has no direct heat, but here is the process for standard charcoal and gas grills.
This method of grilling pizza is simple, and makes great grilled pizza, whether cooking on a charcoal or gas grill. Because of the ability to control the heat more accurately, this pizza grilling method is a little easier on a gas grill. But great results can be had on a charcoal grill, also.
Be sure to expect some failures. It happens sometime. Try grilling pizza for close family first, then make it for friends. You can also practice with the large deli pizzas from the grocery. Once you get the techniques of grilling pizza down pat, the pizza delivery person might as well forget about showing up at your house ever again.
The pizza grilling process relies on the ability to use indirect heat. With one burner (or the side where the charcoal is, if using that) on high, the dough (homemade pizza dough recipe below) is placed right on the grill rack, grilled face-down for a short time, then flipped right-side-up, ready for the toppings.
Place Pizza stone (if desired...You can also place pizza directly on the grill) on the "cooler" side, close, the lid, and Let the stone get hot (about 10 minutes). Place the pizza on the hot stone and close the lid. Check the pizza every 5 minutes to make sure it does not burn. It should be ready in about 15 to 25 minutes, depending on your grill temperature and thickness of the dough.
It takes some practice and some timing on your part to get the crust just right, but you will. Have some patience, and in time it will be worth the effort!
Homemade Pizza Dough
Unlike many pizza doughs and pizza dough recipes, this one does not require refrigeration for easier handling. Once the pizza dough is prepared and frozen for later, you can come home from work and have delicious grilled pizza on the table by sundown (This pizza dough recipe can be prepared and frozen for up to 3 months. Just thaw it in the refrigerator overnight before preparation).
Ingredients:
1 1/2 cups warm (105 to 115 degrees) water
1 package dry yeast
2 teaspoons salt
1/2 teaspoon garlic powder
1/4 cup extra-virgin olive oil (plus some for the mixing bowl)
4 cups all-purpose flour
In a large bowl, mix together the water and the yeast, and let stand for 5 minutes. Stir in the salt, garlic powder, and olive oil. Stir in about 3 1/2 cups of the flour, until a soft dough is formed. Let the dough rise until it is light and puffy, or about 2 hours.
After kneading, punch it down and divide the dough into 4 portions. Wrap each portion tightly with plastic wrap, then freeze.
Thaw the pizza dough in the refrigerator the night before grilling. Coat the thawed dough with oil, then let rise at room temperature. When doubled in size, roll out the dough into thin rounds, ready for the toppings.
Chicken Lollipops...Great appetizers for your party
Chicken Lollipops
Ingredients
Marinade:
12 – 24 Chicken Wing Drumettes
22oz. Beer (I used Budwieser)
1 cup of Canola Oil
¼ cup yellow onion, diced
¼ cup of white sugar
1Tbsp salt
1Tbsp ground black pepper
1Tbsp Italian Seasoning
1Tbsp dry mustard
3 cloves garlic, minced
12-24 Strips Bacon
wooden toothpicks, no color
Chicken Seasoning
BBQ Sauce
Jalapeno Grill
Directions:
French-cut the chicken wing drumettes by cutting the skin around the bottom of the drumette.
Push the chicken meat up into a ball making it into a “lollipop”.
Wrap the ball of chicken meat with a strip of bacon. Secure the bacon with a toothpick.
Mix the marinade ingredients together.
Place lollipops in a 1 or 2 gallon freezer bag meat side down. Marinate for 3 to 5 hours in the refrigerator.
Fire up your grill to 350 degrees. Add a chunk of apple wood the size of your fist to the charcoal for flavor.
Remove lollipops from marinade and pat dry.
Season the lollipops with chicken season. Place the lollipops on the Jalapeno Grill.
Place the Jalapeno Grill onto your grill. Close the lid on your grill and cook for about an hour.
When the bacon is crisp and the juices from the lollipops run clear they are done (around 165 internally).
Serve with a side of your favorite BBQ Sauce in a bowl for dipping.

Okay Ladies....Here Are the Top Ten Wines for BBQ
So you prefer a glass of Vino to the traditional beer with your BBQ. After a bit if research, here is a note for those looking for the perfect wine to complement that juicy steak or smoky grilled chicken? The next time you're invited to a neighbor's barbecue, you're sure to impress by having one of these top selections guaranteed to match up well with grilled meats and veggies on a sweltering summer day. And with prices starting at just $12, these affordable wines will be easy on your wallet, too.
SPARKLING
Codorniu
Pinot Noir Rosé Brut Cava
When Codorniu introduced this Cava in 2001, it was the first Spanish sparkling wine made entirely from Pinot Noir grapes. The result is a wine showing dominant red fruit notes, with a bouquet of raspberries and blackberries. Woodland fruit characters and a crisp citrus finish give this sparkler a notable personality, and its bubbles lend a creamy profile. The rose pairs well with lightly spiced meats as well as honey and balsamic-based sauces. Great with ribs drenched in a sweet barbecue sauce.
Rating: 13.5/20
Price: $15
__________________________
WHITE
Bennett Lane Winery
2009 Maximus White Feasting Wine
This Napa Valley white wine is a blend of 87 percent Sauvignon Blanc, 11 percent Chardonnay, and two percent Muscat. Offering aromas of white peach, papaya and orange blossom, this wine displays flavors of mandarin oranges, mango and nectarine. A crisp and elegant body complements layers of fruit and a clean refreshing finish.
Rating: 14/20
Price: $28
__________________________
WHITE
Iron Horse Vineyard
2008 Native Yeast Chardonnay
Hailing from the Green Valley region of the Russian River Valley in California's Sonoma County, this Chardonnay is comprised of 38 percent Old Wente, 31 percent Stony Hill and 31 percent Rued clones. This wine is mouthwatering as a result of the use of distinct yeast strains from the winery's Corral Vineyard. This zero-malolactic bottling leads with a nose of honeydew, banana and yeast lees. In the mouth, flavors of tropical fruit are revealed along with creamy texture and balanced acidity. It's a surprising match for foods cooked in butter.
Rating: 15/20
Price: $46
__________________________
WHITE
Mirassou Winery
2008 California Riesling
The 2008 Mirassou Riesling was blended with a small amount of Gewürztraminer, giving the wine floral notes on the nose. Crisp fruit aromas are also displayed in this soft and approachable white wine that offers flavors of peach and apple. Naturally firm acid levels make this wine crisp and delicately structured, perfect for pairing with richly sauced poultry or seafood. Its inherent sweetness also makes it a great match for most desserts.
Rating: 13/20
Price: $12
________________________
ROSÉ
RiverAerie
2008 Rosé, Columbia Valley
RiverAerie's practice of saignée, or bleeding, on its Syrahs provides a collateral benefit of producing a small amount of beautifully-colored juice for its Rosé wine. This Columbia Valley, Washington wine is light and fragrant with aromas of berries and cassis. On the palate, flavors of fresh red fruits mingle with hints of cinnamon and anise.
Rating: 12/20
Price: $12
_______________________
RED
Bianchi Winery
2006 Signature Selection Petite Sirah, Plummer Vineyard
This Paso Robles offering is a deep, dark Petite Sirah with earthy-coffee and blackberry jam characteristics. Bold and big, the wine is made using a high portion of aggressive American oak barrels for aromas along with some French oak coopered especially for Petite Sirah and Syrah. The 2008 blend includes about five percent of Bianchi's Estate Syrah, adding even more tannic backbone. Try this in-your-face red with some perfectly grilled tri-tip.
Rating: 13.5/20
Price: $22
_______________________
RED
Cupcake Vineyards
2007 Petite Sirah
This affordable red wine comes from California's Central Coast, whose cooler climate allows for the Petite Sirah berries to develop soft fruit without the harsh tannins that sometimes accompany the little berries. The 2007 Petite Sirah starts with aromas of pomegranate, boysenberry and blueberries that evolve into soft spice accented by dark chocolate on the palate. With a creamy, rich body, the wine finishes in a long and soft manner. Pair with juicy pork tenderloin.
Rating: 13/20
Price: $12
_______________________
RED
Ravenswood
2007 Teldeschi Zinfandel
The Sonoma County Teldeschi Zinfandel is comprised of 76 percent Zinfandel; 22 percent Petite Sirah; and two percent Carignane. Native yeast fermentation, small open-top fermenters, and small French oak cooperage are some of the things that give this Dry Creek Valley wine its power and big flavors. Richly perfumed with scents of black raspberry, apricot, and aromatic spices, this wine exhibits subtle tobacco flavors coexisting with dominant red and dark berry flavors along with sweet plum and vanilla.
Rating: 14/20
Price: $35
________________________
RED
Seven Hills
2006 Tempranillo, Columbia Valley
The Spanish varietal Tempranillo is relatively new in Washington's wine grape growing regions. The grapes in this wine are sourced from two distinct sites: one on a south-facing gravelly slope near Mattawa and the other a terrace of silt loam in the Walla Walla Valley. Both are among the oldest plantings in the Northwest. The fruit was hand-picked under ideal weather conditions. The resulting Tempranillo exhibits a medium-bodied, ripe, accessible style. It shows cherry fruit, with exotic hints of rhubarb, smoke, savory herb and rose petal notes. Vanillin and subtle spice add complexity on the palate of sweet, bright fruit with a clean finish and mild, dry tannins.
Rating: 13.5/20
Price: $20
________________________
DESSERT
Moët & Chandon
Nectar Impèrial NV
Approximately 200 individual crus make up this cuvée, which is a special assemblage of the three grape varieties built around the structure of Pinot Noir. The traditional proportions for Nectar Impèrial are: 50-60% Pinot Noir; 20-30% Pinot Meunier; 10% Chardonnay; and 10-20% vins de reserve. The resulting Champagne offers rich expression of ripe exotic fruits with hints of honey, and exhibits strong fruitiness with a smooth finish. Its subtle sweetness makes this sparkler a perfect pairing for grilled peaches at a BBQ.
Rating: 14.5/20
Price: $40

Drunken Beer Butt Chicken
There have been several asking about this method of preparing chicken so here it is.... behold, the beer butt chicken!
Beer Butt Chicken Recipe (What you will need)
Olive Oil
Whole Chicken
Kosher Salt/ or Lowery's Seasoning
Fresh Pepper
Can of beer (if you are anti-beer you can use Sprite or Mt. Dew with great results)
How to Make Beer Butt Chicken
1.Heat the grill ( or even your oven) to 375 degrees; make sure that it is heated all the way, don’t throw the bird in to the cold grill. Now open the can of beer, take a good swig, and enjoy the cold refreshing drink.
2. If you take small drinks take another sip leaving just over half the liquid in the can. Resist the temptation of finishing what is left, you need this for the roasting. The beer will make the chicken exceptionally juicy and moist.
3. Set chicken on can, inserting can into the cavity of the chicken. The chicken should be standing on its legs supported by the beer can inserted in the cavity, hence the name of beer butt chicken. You can purchase a can holder as pictured below to help balance the bird. Lightly oil, using enough to make the entire surface of the meat glisten, but not so much that you leave a puddle.
4. Season the chicken well. Kosher salt and freshly ground peppers are all the seasonings you need. Most people go too easy on them, I say don’t be shy.
5. Place baking sheet with beer and chicken on the grill. Word of advice: two sets of hands here are better than one! The chicken is done when the internal temperature reaches 180 degrees. For a 4~5lbs bird, you are looking at any where from an hour to an hour and half, at the most. But don’t let the time decide the fate of your dinner guests; stick an instant read thermometer to make sure that you don’t undercook, or even worse overcook.
6. Once the chicken is done, let the bird rest for 10~15 minutes so that your guest have time to admire it and wow over it :) Okay, this is to allow the juices to settle back into the meat, but there’s nothing wrong with impressing. Remove the chicken from the beer can using oven mitts and tongs. Be very careful, the can is still very hot. Again, two sets of hands are best.
The end result, is roasted chicken without the usual hassle. Brown and crusty all over, juicy and flavorful inside; and some argue, superior to the standard oven roasted bird.
Brisket 101 - One of the finest cuts of meat to Slow Smoke BBQ
Buying The Right Brisket
You will find two types of brisket at the store. Trimmed and Untrimmed. From the viewpoint of slow smoking, use the untrimmed brisket. During the 4 to 12 hours of cooking, the fat, when placed on top, will drip over the meat and help keep it moist. This will retain the juices and flavor of the meat. When completed, the fat can be trimmed off. For purposes of serving it is good to know that a brisket will weigh-in after cooking at about 50% of the uncooked weight. Remember this at the time of purchase so no one goes hungry!
Barbecuing The Brisket
First I recommend removing the brisket from the refrigerator and allowing the meat to warm to room temperature for approximately 1 hour. After that time, use a dry rub on the surface of the meat and allow the it to "stand" at room temperature for an additional hour.
When it comes time to actually barbecuing the brisket, place the fat side up at 225 to 230 degrees, for 8 to 12 hours. If you use charcoal as the source of the heat, the brisket will result in a smooth smoked flavor. If on the other hand, you opt for burning actual wood in the firebox, then expect a much stronger smoke flavor that can verge on being bitter.
Cleaning A Cooked Brisket
Once the brisket has finished cooking, for great presentation, we suggest cleaning it to remove any unwanted outer fat. Your guests will appreciate your efforts greatly! Locate the fat side and the broader lean side (bottom) of the brisket. There is also an important inner fat layer separating the two halves. Start at the back or the large end of the brisket and start to separate it with a knife. Keep poking around, you will locate the fat. If you are cutting meat, then you are not in the correct place.
Follow the fat layer with the knife while lifting the fat side up. This aids in viewing what is being cut. Eventually, the two layers will be separated! Once you have two slabs of brisket, one lean and flat and the other fatty and enlarged, take a knife and slowly remove any visible fat. Keep the knife flat against the meat and shave the fat off. Keep going until it looks like it can be served.
Slicing A Brisket
Once the brisket has been cleaned, place the trimmed 'fat side' (which has more fat in the meat spaces) on top of the trimmed 'lean side' (which has very little fat in the meat) and slice against the grains of the meat. This will give everyone one slice of each type. I prefer using an electric slicing knife.

Quick Tips for BBQ Seafood and a Smoked Salmon Recipe
Tips:
•Use fresh seafood, if you can. Don't cook frozen seafood without thawing at room temp first.
•If you are using thin filets of fish, wrap them in foil or place foil underneath them while BBQing them on the grill. If you don't, they may fall apart. With the exception of Tuna and Salmon, I always use the foil.
•Shrimp are difficult to BBQ on a grill without overcooking them. Try jumbo shrimp or precooked shrimp that only need to be heated up.
•Fish is done when the meat in the middle has turned opaque in color, or the edges begin to char.
I personally don't care for the Smoked Salmon, but Tammy likes it so I cook it. Here is a great recipe to make your Salmon sing:
1 Large Salmon Fillet
Salt and Pepper
Lemon Pepper Seasoning
Italian Seasoning
1/2 fresh lemon
Mayonaise
If you are not using a smoker, add 1/2 teaspoon of liquid smoke to your ingredients.
Wipe fish with a damp paper towel. Salt and pepper to taste. Coat entire flesh side of fillet with mayo, then sprinkle with Italian seasoning and lemon pepper. Place skin side down on your preheated grill or smoker. (If using a smoker - first allow it to smoke on a low heat for about 30 minutes for taste)
Grill at 400-450 for 3 to 5 minutes or until the fish flakes when tested with a fork.

This Football Season, Try Smoking Your Wings

Rub Ingredients:
Paprika
Sugar
Salt
Pepper
Onion Powder
Garlic Powder
The Glaze:
1 Cup Honey
1/2 Stick Butter
Texas Pete, Franks or other favorite Hot Sauce
A chicken wing has three parts. You can cook them whole or cut them apart (the traditional way). Sometimes I cut 'em & sometimes I don't. The tips have almost no meat and can be tossed. If I cook them whole I leave them on. I love to chew on the dried out wing tips.
Rinse your meat and pat dry. Cut 'em apart if you want. Lightly dust them with your rub. Use what's listed above or use your favorite. Toss them on your smoker with some apple, cherry or hickory wood. The prefered temp is around 210°, and smoke for about 2 to 2 1/2 hours. I like to go to about 180° internal with chicken to be safe -and... you should be able to suck the meat off the bone.
While your wings are smoking, start your glaze. Heat the honey and butter over low heat until the butter is melted. Stir in the hot sauce and keep warm until your ready. If you really like the Hooter's sauce you can use it here.
After smoking toss the wings on the grill over medium, direct heat. Be sure to spray or oil the grate to reduce sticking. You'll need to watch these. They will only take about a minute (or less) per side. Remember these are already cooked. You are just looking to crisp up the skin a bit.
Throw them in a large bowl, pour in the sauce (save some for dipping) and toss to coat. Serve with a couple dipping sauces. I recomend blue cheese (very traditional) some of the glaze and for a real treat - sour cream.
Great and Easy Marinade

1/2 cup Vegi or Olive Oil
1 cup Soy Sauce
1/2 t. Coarse Salt
1/2 t. Coarse Pepper
1/2 t. Garlic Powder
1 T Ground Ginger
1 T. Dry Mustard (bottled mustard will work as an alternate)
1 Chili Pepper or ....if you like it spicy Jalapeno
Combine all ingredients as shown. Marinade your favorite meat in it for several hours for maximum flavor. You can also use this non-sugar based marinade as a mopping sauce.
If you are cooking pork then add some a 50% portion of citrus (Apple, Orange, Cranberry, etc.) to the mixture.
Gotta great marinade recipe...share it here in our comments!
Basting and Mopping
Basting the meat while cooking helps keep it moist and is a great way to add additional flavors. The baste should be applied with either a basting mop or a spray bottle. If you use a spray bottle, the ingredients must be mostly liquids with soluble powders. For larger portions the technique is defined as mopping. At large BBQ establishments such as the famous Dreamland Ribs in Tuscaloosa, the use an actual mop.
Tip: Don't use a basting brush if you are using a dry run as it will brush off the dry rub seasonings. A spray bottle works best in this instance.
Basting sauces should contain 50% oil and 50% acid (vinegar, citrus, etc.). As previously stated when cooking pork always thonk citrus (apple, cranberry, orange, etc.). For oil I prefer Olive Oil. To that mixture, you may add additional ingredients such as onion and garlic powder, ground pepper, etc. If you are going to make a generous amount of baste (or mop sauce), then you may use celery, onion, garlic, carrots, etc. and then strain the ingredients before using. I like to heat the basting mixture on the stove or grill top first to molecularly combine the flavors.
Apply baste every 15-30 minutes or 1/2 the way through cooking.
Dont Press Those Burgers-Preserving the Natural Juices in BBQ/Grilling
I will never forget Mrs. Bethea's Home Ec class in middle school, when we cooked burgers, and she kept saying, "Dont Press Down On Those Burgers, You Letting the Flavors Out"
Most of us love nice juicy burgers, mouth water steaks, deliciously moist chicken and tender sweet pork. It always pains me to see a bored cook using his spatula like a automobile squishier to drive out the juices just to see the grill flare and smoke to show his/her prowess at the controls of the grill. Actually he/she is making a mess of the grill and will only be able to offer dried out meat to eat. Another mistake is the constant flipping and turning of food.
Here are some helpful ways to manage the meat without loosing those wonderful juices:
Whole chicken: Use some sturdy tongs or a carving fork and insert them in the cavity of the chicken to rotate or move it around. There is usually no reason to "flip" it over and cook on the breast side so rotating is sufficient.
Chicken parts: Use the same tongs and grab the bones and not the meat. If this proves too difficult, use a steak hook to grab a tendon near the bone and with one quick flip turn it over. Never pierce the center of the meat. When you have done this, what happened....juices flowed and the grill consumed the flavor and moistness that was meant to remain in your chicken.
Steaks: This is easy. Use a medium or large steak hook to pierce a corner of the meat and gently flip it. You may also use some tongs and grab the sides. Do not grab it in the middle. If you decide to use a spatula, be careful not to scrape off any seasoning.
Ribs: Use either the small steak hook and grab the end bone and flip or use some tongs and grab the bones. Try not to mar the meat by using tongs to grab the middle.
Brisket: Use a couple of spatulas, or insulated gloves. These are so heavy that tongs don't really work.
Pork: This is a much more tender meat and as such steak hooks are impractical. Use tongs if the size is 2-3 pounds. If larger, use a couple of spatulas or insulated gloves. Be tender with it!
Sausage: This is also easy. Use tongs. Spatulas offer too much of a balancing routine!
Burgers: Use a spatula or combination spatula/tong and be careful not to scrape off the seasonings. Remember: Dont Press Down on the Burger!
As you can see, we would not recomment a carving fork to impale the meat allowing the juices flow freely. If you see that you are doing that, give some thought to another means of achieving your goals. Tough, dry meat is no treat! Save the flavors!
This tip dedicated to Mrs Bethea who taught generation of Walton Middle School Students the art of cooking and a bit of sewing as well.

How to Grill Veggies
Often overlooked, grilled veggies are probably the best way to eat your vegetables! Here are some basic rules of the road when cooking great tasting veggies outdoors:
One: Always select the highest quality of vegetables. They are inexpensive compared to meat, so go hog wild and they will certainly complement any meat item you are preparing. Obviously the freshest veggies are best and avoid any visible signs of damage. If you have a Summer garden, then half the work is done. In general, the skin should be bright/fresh in color and relatively firm when touched.
Two: To help avoid charring, I use a small amount of olive or canola oil to marinade or baste the veggies with. You can use this during the actual cooking if desired.
Three: Not all veggies cook at the same rate or in the same amount of time. When you learn to "time" your vegetables (i.e. the ones taking longer, go on the grill earlier) so that they all come out done at the same time. If using charcoal you can "bank your fire" so that it is hotter in some areas more so than in another area. That way, you can cook some veggies just a little hotter than others. Be careful not to burn them using this technique.
Cooking Times and Temps..When is it Done
One of the most important items in our BBQ arsenal is a quality internal temperature monitor. Timing and internal temperature are the only way to verify that your product is properly cooked, while remaining moist and tender. In the chicken category this is absolutely essential, as an uncooked piece will result in an immediate disqualification or your turn in box.
Here is a basic guide to internal meat temps:
Steak/Burgers (rare) 140 degrees
Steak/Burgers (medium) 150 degrees
Steak/Burgers (well) 160 degrees
Chicken thighs/legs 175 degrees
Chicken breast 180 degrees
Turkey all pieces 180 degrees
Pork Ribs/Chops 165 degrees
Pork Butt 180 degrees
and a favorite Hot dogs - just cook til they are bubbly:)

Pork Marinade
My competition pork marinade remains a secret, but often times during backyard BBQ I have found many very effective substances and ingredients to give your marinade some character.
If you simply plan to hit the store, there is nothing better than Dale's for a can't miss marinade. They offer a low sodium variety for those concerned with such matters. When creating your own marinade, a great liquid base is a can of original Coke. The sugars and carbonation have a wonderful effect on the meats. Dr. Pepper is also a favorite and the newly released Dr. Pepper Cherry with a KISSSSSSSSSS of cherry was used recently with great results.
Sounds strange but add a touch of apple, orange, or cranberry juice to your marinade. Pork is naturally a bland meat, so the acidic liquid will being a wonderful flavor to you pork.
Other basic tips:
Add a bit of our rub mixture, so the meat has the consistent flavor inside and out.
Mix your marinade seperately then pour over your meat. Don't simply pour the ingredients into the pan that contains the meat.
Ziplock bags work great and allow you to turn the meat to insure full coverage.
Make enough! Dont leave the pork exposed or half covered by the marinade. Mix enough to cover the entire batch of pork.
Once the marinade mixture is complete, place it in the fridge for soaking.
Once the marinade is complete, pour it up to use for basting or spraying on the meat during cooking. This keeps the meat moist during those long slow cooks and prevents waste of a good marinade.
Finally, when in doubt as to what to place in your Marinade...add a beer (no light beer). It helps to have at least two on hand. One for the marinade and one for the cook. Got some great marinade tips or ingredients , please share them in a wall post.
Great Bourbon BBQ Sauce
1/4 cup (1/2 stick) unsalted butter
1/2 cup minced onion
4 cloves of garlic
Two 8 ounce cans of tomato sauce
1/4 cup firmly packed light brown sugar
1/4 cup Worcestershire sauce
1/4 cup fresh orange juice
2 Tbs bourbon (I prefer Maker's Mark or Gentleman's Jack)
2 Tbs distilled white vinegar
2 Tbs fresh lemon juice
1 Tbs chili powder
2tsp grated orange zest
1 tsp fine sea salt
1/2 tsp ground allspice
1/2 tsp cayenne pepper
Melt the butter over medium heat in a medium-size non reactive saucepan, add the onion and garlic, and cook, stirring, until softened. Add the remaining igredients and bring to a boil. Reduce the heat to medium-low and simmer for 30 minutes to let the flavors develop, stirring occasionally.

Subscribe to:
Posts (Atom)