Great for tailgating!
Ingredients:
1 beaten egg
2 tablespoons milk
2 tablespoons ketchup
1/4 cup finely crushed saltine crackers (7 crackers)
1/2 teaspoon salt
1 pound ground beef
4 thin slices onion
4 slices sharp American cheese
1/4 cups chopped onion
1/4 cup butter or margarine
1/4 cup ketchup
2 tablespoons brown sugar
1/2 teaspoon prepared horseradish
1/2 teaspoon salt
Combine egg, milk, and 2 tablespoons ketchup; stir in cracker crumbs and 1/2 teaspoon salt. Add ground beef; mix well. Form into four patties; place each on a 12-inch square of heavy-duty foil. Top each patty with 1 slice onion and 1 slice cheese.
Cook chopped onion in butter till tender but not brown. Add 1/4 cup ketchup, brown sugar, horseradish, and 1/2 teaspoon salt; simmer, uncovered, 5 minutes. Spoon over burgers. Wrap foil loosely around meat, sealing edges well. Cook the bundles over medium heat,250 degrees, onion side down, for 15 minutes. Turn burgers over; grill till desired doneness, about 10 minutes more.
Makes 4 servings.
Welcome to the Pleasant Ridge BBQ Team blogspot. PRBBQ Team is a family professional BBQ Team from DeFuniak Springs, Florida. At PRBBQ we combine technology, skill, and innovation combine to produce award winning results in BBQ. Find us on FACEBOOK at Pleasant Ridge BBQ.
Showing posts with label Beef. Show all posts
Showing posts with label Beef. Show all posts
Tuesday, September 13, 2011
Wednesday, July 13, 2011
The Science of the Perfect BBQ Brisket
Nothing is better in BBQ than a brisket that is so tender it comes apart with a slight tug. Obviously low and slow is the key here but how low and how long depends on a few factors. If you don’t cook it long enough, you might as well soak your shoe in beef broth and serve it up because it will be just as tender. If you cook it too long, it will surely come apart with a slight tug but it will be dry and pasty (Yes, I said P-A-S-T-Y) on the tongue and lose a lot of flavor. BBQ brisket has baffled some of the best chef’s around the country. There is a small window with minimal margin for error to cook the best brisket. Everything you need to know is comes from the brisket before cooking and knowing a little physiology about muscle tissue in mammals. The thickness of the brisket, fat cap and marbling can tell you just how long you need to cook your brisket and at what temperature is best. My goal is to show you how to increase that window between tender and moist to dried out and ruined so your briskets come out perfect each time. The following is a description of what is the best way to cook your brisket combined with a little science and research data to help you understand the crown jewel in Texas BBQ, the Brisket.
The first thing you need to do is buy quality brisket. I only have two musts for my brisket and that is a USDA grading of Choice or better and it has to be Angus. You will not find anything better than Choice in the grocery store and very few butchers have Prime cuts and they generally reserve that for special customers only. If you have a regular butcher and you do BBQ a lot, I recommend putting him on the Christmas card list and buddying up to this guy because he will eventually go out and buy the better cuts for you when there is a price break and such and it will pay great dividends in your Q. As for the latter, I personally prefer Angus cuts. They are naturally a higher marble content species of bovine with the higher altitude and climates around here and the breeds around this part of the country are fed better than those in the Midwest. Either way, find one you like or that your new best friend the butcher recommends and go from there.
Some people recommend never freezing a brisket but I personally have not had any problems with it and I am fairly sure it was frozen at some point between the meat processing plant and my local butcher or Sam’s Club, who carries Angus choice briskets, so I won’t talk about positives or negatives other than to tell you it takes about three days to thaw in the refrigerator.
I try to buy mine three days before smoking and keep it refrigerated until about an hour before brining. This allows the pores in the tissue to open as much as possible to soak up the brine deeper in to the tissue. While it is warming I look at my brisket on all sides and get a feel for the fat cap. The harder and denser the fat cap usually is a good indicator of how thick it is. I trim the fat cap down to ¼ inch thick. You will also need to trim the thick dense part along the vein between the Flat and the Point. The Flat is the deep pectoral muscle that runs across the chest of the cow between the front legs. The Point is the supraspinatus muscle on top of the flat or simply put the breast of the cow. Trim the fat by cutting a V shape along the vein separating the flat and point. You may want to start by trimming a little at a time to make sure you are not trimming too much fat and start cutting away tissue. It comes with practice and of course every brisket is different. Another thing I like to do is cut the brisket in half. For starters, a whole brisket is 14 -18 pounds. I love BBQ but the average family of four won’t eat that in a month eating brisket every other day. I also like to have a lot of bark around my brisket because I like to do various things with the “burnt ends.” (I will have to put my burnt ends uses in another blog someday.) The other reason is I like to get a good look at the cross section to check the marbling, amount of fat under the lip or top piece of brisket and of course, check the thickness. These are indicators of what I should expect to see during the smoking process and I will get into those with more detail in a bit.
So now we have our brisket cut in half and trimmed. One last cut I make is a slight trim on the corner of the brisket on the thin end. I cut off a small piece of the corner against the grain so I can mark it when it is time for slicing. After 18 hours in a smoker it is not going to always be easy to determine the grain of the flat.
While it is warming up a bit in a roasting pan, or any vessel that can hold it, prepare the brine solution. You can flavor the brine any way you want to but it needs to have these three ingredients in the following ratio at minimum: 12 cups cold water/ ½ cup kosher salt/ ¼ cup sugar. It can be brown sugar, cane sugar, honey, whatever you like it all comes down to your preference. I add two tbsp. of Cider vinegar to get the acid in my brine and help tenderize the beef a little more. Do not use more than that or it can turn the outside of your brisket to mush. Combine six cups of water, salt, sugar and whatever flavor enhancers you are using in a sauce pot and heat to a boil so all ingredients dissolve. I then remove from heat and add the remaining water in frozen form or ice cubes so the brine can cool quicker. Do not brine your brisket in hot brine because it will begin to cook your brisket. When your solution reaches 40 degrees, pour over the brisket and cover it by at least a half of an inch. Cover and put in the refrigerator for at least 24 hours.
The next day, take your brined brisket out of the refrigerator and remove the brisket and dispose of the brine. Pat the brisket dry and put in a wide and deep pan. Six inch hotel pans are great but you can use the disposable roasting pans from the grocery store. At this point you are ready for seasoning with rub. Many people will tell you that in East Texas it is salt, pepper, garlic and chile powder. The purists in Central Texas will tell you salt and pepper only. I use a few more because that is what I like and it has some positive effects on the meat during cooking. Please don’t send me 1000 emails telling me I am a traitor to Texas BBQ. There are hundreds of Texas companies and Pit-masters from Texas who sell brisket dry-rubs with a listing of ingredients that looks like the spice aisle at the grocery store. I use eight spices including kosher salt to bring out a little moisture for my crust and some brown sugar which will melt during early cooking and help to form a shell around the brisket sealing in the moisture.
Do what you like, experiment and have fun. Apply your rub and apply a lot. Do not be shy here. Work it into every crevice and inch of surface area of the beef and work it in good. This will only affect the outer 1/8 inch or so but a good rub makes for a good crust and that is BBQ gold in parts of Austin I hear. After rubbing in your rub or spices, allow to sit for about two hours.
While your brisket is sitting again, start up your smoker. I always like to start off brisket with Mesquite. It has a stronger smoke taste than other woods and I want that early penetration to take hold. After the first hour, I switch to Pecan or Hickory. They are mild compared to the Mesquite and add a sweetness to the flavor as well. After six or seven hours I stop the wood and go with straight charcoal or oak for consistent temperatures only. There is more than enough smoke in your brisket at this point and I am sure your smoke ring is set. You don’t want the meat to get to bitter which can happen if you over smoke it.
Get your smoker up to 210 degrees and make sure it is holding temperature. Place your brisket in the smoker with plenty of room on each side. Insert a temperature probe in the brisket and seal off the smoker and keep an eye on temps.
Many will tell you that it should take 1½ hours per pound of brisket to smoke properly and I can tell you that is a load of crap someone probably found in a Better Homes and Garden cookbook. I cut mine in half and I can tell you it takes almost as long to cook my 8 pound half as it does a whole sixteen pound brisket. This is a primal cut and stretches close to twenty inches long and as thick as four inches in some places. My rule of thumb is to cook it for approximately four hours for every inch thick it is and that is still an approximation because the fat layer between the flat and point as well as the amount of marbling and collagen are mitigating factors as well.
This is where the science comes in. When I looked at the cross section of the brisket I obviously measured the thickness to know approximate cooking times but I also wanted to see the amount of marbling as well as connective tissue. Marbling is the natural fats in between muscle tissue that adds flavor to beef, pork, chicken etc… Fat varies from animal to animal and can even vary inside the same one. It looks like the salt deposit veins in well “Marble”, hence the name. One thing fats do have in common is that the molecules are tied together by a Carboxylic acid, also known as Glycerol, on the end. These Glycerols start to break down between 150 and 170 degrees but do so very slowly. If heated to fast, they tend to bind with the nearby connective tissues and curl up. Have you ever seen bacon cook completely flat? I didn’t think so.
Connective tissue is made of three types of protein, Elastin, Reticulin and Collagen. Elastin and Reticulin are found largely around ligaments and joints and do not break down during cooking. You may have had a cheaper cut of steak and had some gristle that chewed like a rubber band or seen silver skin in the roast beef. This is Elastin and Reticulin. The majority running through muscle tissue is Collagen and when heated it turns into a soft gelatin. These three together form a good wall of protection for the muscle fibers and you will notice as your internal temperature rises in the brisket it begins to level off as it approaches 180 degrees. This is the collagen breaking down and becoming a nice soft gelatin. The process is known as “temperature plateauing.” It is the connective tissues fighting off the heat and eventually subsiding when the collagen breaks down. The chart shows the brisket approaching this wall, hitting a plateau and then starting to rise back up again after the collagen has broken down.
If you look at the chart, the brisket starts off hour one at or around 40 degrees and is rising in internal temp at around 20 degrees per hour. This allows the Dry-rub to form that crust or shell around the meat. The sugars in the rub begin to melt around 200 degrees and this forms a shell around the brisket. However it will dry out and begin to crack after 5 hours when the crust is set. At this point, I spray a solution of four parts water/ 3 parts apple juice / 1 part cider vinegar as a moisturizer on the brisket every hour until I pull it from the smoker. This will help keep the moisture in the crust where it needs to be while the moisture in the brisket stays trapped in the brisket.
When all of the collagen has dissolved, the temperature will rise again eight to ten degrees in one hour. At this point you want to remove the brisket and place it in a few layers of aluminum foil, fold up the sides, pour in a half cup of apple juice and close it off. Put it back in the smoker for one or two more hours to let the juice cook in and flavor the meat once more. You’ll know it is done when the internal temperature levels off again around 195 degrees.
At this point I remove the brisket and place it in an Igloo cooler or thermos and let it rest for 45 to 60 minutes. This allows the muscle tissue, which constricted and shrunk during cooking, to cool a bit and re absorb the juices it squeezed out during cooking. You have waited a day of brining and nearly another day cooking. You can wait one more hour.
When you are ready to slice, remove the brisket from the foil but save the juices in the foil packet. You can skim the fat and this makes for a great base to a great BBQ sauce when reheating the leftovers (another recipe for another time). If you did your job right you will notice the brisket has a nice little jiggle to it and I tell you it always puts a smile on my face to see it quiver that way.
When ready to carve or slice your brisket you will need to separate the point from the flat. The grain of the flat is generally the length of the brisket with a slight angle to it. The grain on the point is going in a perpendicular direction and will mess up your slicing. If you have high heat gloves you can pretty much just pull the two pieces apart. If not, it will cut fairly easy. Just make small cuts across the fat seam and start to pull away. The point is popular sliced or used for Chop or burnt ends. It is just as delicious as the rest of the brisket it is just a different muscle. The flat is going to be fairly uniform in thickness. It is good for sandwiches for everyone and just plain good BBQ, it is also the best part to use for judging and presentation especially if you want to show a quality smoke ring which will be quite noticeable on your brisket.
So what science helped increase the window of success here? Physical reaction #1- Trimming the fat to a consistent layer over the brisket reduces the cooking time by reducing the insulated blanket provided by the fat and allows the brisket to cook evenly. Chemical reaction #1 – The vinegar and salt in the brine reacts with the outer ¼ inch on the brisket. The vinegar helps to tenderize the beef while the salt is in a higher concentration and will repel moisture from leaving the beef early. Physical reaction #2 – The Dry-Rub coats and when melted, forms a layer or shell around the brisket holding in the moisture when heated. Chemical reaction #2 The bond between the Collagen, Elastin, & Reticulin is broken apart by the slow and steady heat. The Collagen becomes a soft gelatin and moisturizes the meat even more. Physical reaction #3 – The fat melts from the heat and moisturizes and flavors the brisket as it drips away. Choice cuts have modest to medium marbling and require a bit more time to cook properly. Seeing this I knew that 210 would be the best temperature to cook at. You can speed up the process by raising the temperature to 225-250 degrees but then your window of success shrinks again. I recommend this method for continued enjoyment of tender brisket.
I like mine without sauce. I want to taste the smoky flavor balanced with the flavor of the rub and the meat. Sauce is ok for leftovers but you did an amazing thing here you should be proud of what has happened in both a culinary and scientific viewpoint. The chemical and physical reactions from the last 48 hours of your labor have produced a culinary delight that has baffled many chefs over time.
Sunday, November 21, 2010
London Broil
Tonight, I decided to try a London Broil on the Traeger for dinner. Marinaded in solution of Dales, Mustard (1teaspoon), Apple Juice and a shot of bourbon. After marinade I covered it with olive oil and then rubbed with a combo of blackening seasoning, Lawry's seasoned salt, paprika, and garlic powder.
Smoked on medium heat 200-250 for hour then finished at high for 45 min. Cory and Tammy like beef rare, so I planned to pull it when the internal temp reached 120. Then let it rest for 20 minutes and cut with the grain into thin slices.

Smoked on medium heat 200-250 for hour then finished at high for 45 min. Cory and Tammy like beef rare, so I planned to pull it when the internal temp reached 120. Then let it rest for 20 minutes and cut with the grain into thin slices.

Smoked Brisket Recipe!
This traditional Texas-style Beef Brisket recipe will produce a great piece of smoked meat. This basic recipe gives you all you need to know to smoke a brisket. From here you can learn to take your brisket to a whole new level.
Ingredients:
Preheat smoker and add wood chips (follow your instruction manual). Clean and dry the brisket. Apply chili rub. Place brisket in smoker for approximately 8-10 hours or until the internal temp reaches 160 degrees. Keep the smoker temperature at about 220 degrees F. To increase tenderness, take the brisket out of the smoker, wrap in aluminum foil and place in oven at 180-200 degrees for the last two hours. Typically after 8-10 hours a piece of meat will have absorbed as much smoke as it can and additional smoking may impart a bitter flavor.

Ingredients:
- 8-10 pound untrimmed brisket
- 1/2 cup chili rub
- wood chips/pellets (oak, fruit wood, hickory)
Preheat smoker and add wood chips (follow your instruction manual). Clean and dry the brisket. Apply chili rub. Place brisket in smoker for approximately 8-10 hours or until the internal temp reaches 160 degrees. Keep the smoker temperature at about 220 degrees F. To increase tenderness, take the brisket out of the smoker, wrap in aluminum foil and place in oven at 180-200 degrees for the last two hours. Typically after 8-10 hours a piece of meat will have absorbed as much smoke as it can and additional smoking may impart a bitter flavor.

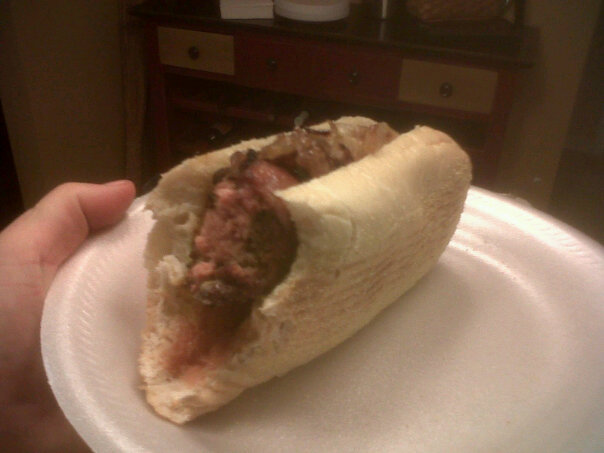
Bacon Burger Dogs! A great College Football Season recipe
Bacon Burger Dogs
Bacon Burger Dogs were discussed at length on "The Cosby Show" in the 80's. While we never saw Cliff and Theo Huxtable eating Bacon Burger Dogs, the concept was so impressive we have come up with our own version. You may want to consult your cardiologist or have a defibulator device on hand for this one.
Time Required: For prep, it takes a while the first time you make them; allow an hour for 15 BBD's. After that you get the hang of it. Cooking time is 20-20 minutes.
Ingredients:
- About 6-8 ounces of ground beef per Bacon Burger Dog (BBD)
- One top-notch hot dog per BBD; use long-and-narrow dogs, not the shorter and plumper variety
- Two strips of bacon per BBD
- Sub/hoagie roll
- Ketchup and/or mustard; this is up for debate and depends on personal preference. While hot dogs generally call for mustard-only, and hamburgers ketchup-only, many feel that the BBD can handle both. Many also feel the BBD requires no condiments or possibly only chili or chopped onions. Please excuse me for rambling, but this important topic deserves our time and consideration.
- Grab a handful of ground beef and spread it out flat in the shape of a square that is not as long as your hot dogs; you want about 6-8 ounces per BBD
- Place a hot dog on the beef and roll it up
- Press the beef together so the hot dog is wrapped up; the ends of the dog should stick out
- Wrap the burger/dog combo in two strips of bacon, so that the bacon runs diagonally around the Burger Dog
- Grill for 20-30 minutes over medium heat; you want the beef to cook without burning the bacon.
- Serve on a Hogie Roll


Brisket 101 - One of the finest cuts of meat to Slow Smoke BBQ
Buying The Right Brisket
You will find two types of brisket at the store. Trimmed and Untrimmed. From the viewpoint of slow smoking, use the untrimmed brisket. During the 4 to 12 hours of cooking, the fat, when placed on top, will drip over the meat and help keep it moist. This will retain the juices and flavor of the meat. When completed, the fat can be trimmed off. For purposes of serving it is good to know that a brisket will weigh-in after cooking at about 50% of the uncooked weight. Remember this at the time of purchase so no one goes hungry!
Barbecuing The Brisket
First I recommend removing the brisket from the refrigerator and allowing the meat to warm to room temperature for approximately 1 hour. After that time, use a dry rub on the surface of the meat and allow the it to "stand" at room temperature for an additional hour.
When it comes time to actually barbecuing the brisket, place the fat side up at 225 to 230 degrees, for 8 to 12 hours. If you use charcoal as the source of the heat, the brisket will result in a smooth smoked flavor. If on the other hand, you opt for burning actual wood in the firebox, then expect a much stronger smoke flavor that can verge on being bitter.
Cleaning A Cooked Brisket
Once the brisket has finished cooking, for great presentation, we suggest cleaning it to remove any unwanted outer fat. Your guests will appreciate your efforts greatly! Locate the fat side and the broader lean side (bottom) of the brisket. There is also an important inner fat layer separating the two halves. Start at the back or the large end of the brisket and start to separate it with a knife. Keep poking around, you will locate the fat. If you are cutting meat, then you are not in the correct place.
Follow the fat layer with the knife while lifting the fat side up. This aids in viewing what is being cut. Eventually, the two layers will be separated! Once you have two slabs of brisket, one lean and flat and the other fatty and enlarged, take a knife and slowly remove any visible fat. Keep the knife flat against the meat and shave the fat off. Keep going until it looks like it can be served.
Slicing A Brisket
Once the brisket has been cleaned, place the trimmed 'fat side' (which has more fat in the meat spaces) on top of the trimmed 'lean side' (which has very little fat in the meat) and slice against the grains of the meat. This will give everyone one slice of each type. I prefer using an electric slicing knife.

Dont Press Those Burgers-Preserving the Natural Juices in BBQ/Grilling
I will never forget Mrs. Bethea's Home Ec class in middle school, when we cooked burgers, and she kept saying, "Dont Press Down On Those Burgers, You Letting the Flavors Out"
Most of us love nice juicy burgers, mouth water steaks, deliciously moist chicken and tender sweet pork. It always pains me to see a bored cook using his spatula like a automobile squishier to drive out the juices just to see the grill flare and smoke to show his/her prowess at the controls of the grill. Actually he/she is making a mess of the grill and will only be able to offer dried out meat to eat. Another mistake is the constant flipping and turning of food.
Here are some helpful ways to manage the meat without loosing those wonderful juices:
Whole chicken: Use some sturdy tongs or a carving fork and insert them in the cavity of the chicken to rotate or move it around. There is usually no reason to "flip" it over and cook on the breast side so rotating is sufficient.
Chicken parts: Use the same tongs and grab the bones and not the meat. If this proves too difficult, use a steak hook to grab a tendon near the bone and with one quick flip turn it over. Never pierce the center of the meat. When you have done this, what happened....juices flowed and the grill consumed the flavor and moistness that was meant to remain in your chicken.
Steaks: This is easy. Use a medium or large steak hook to pierce a corner of the meat and gently flip it. You may also use some tongs and grab the sides. Do not grab it in the middle. If you decide to use a spatula, be careful not to scrape off any seasoning.
Ribs: Use either the small steak hook and grab the end bone and flip or use some tongs and grab the bones. Try not to mar the meat by using tongs to grab the middle.
Brisket: Use a couple of spatulas, or insulated gloves. These are so heavy that tongs don't really work.
Pork: This is a much more tender meat and as such steak hooks are impractical. Use tongs if the size is 2-3 pounds. If larger, use a couple of spatulas or insulated gloves. Be tender with it!
Sausage: This is also easy. Use tongs. Spatulas offer too much of a balancing routine!
Burgers: Use a spatula or combination spatula/tong and be careful not to scrape off the seasonings. Remember: Dont Press Down on the Burger!
As you can see, we would not recomment a carving fork to impale the meat allowing the juices flow freely. If you see that you are doing that, give some thought to another means of achieving your goals. Tough, dry meat is no treat! Save the flavors!
This tip dedicated to Mrs Bethea who taught generation of Walton Middle School Students the art of cooking and a bit of sewing as well.

Subscribe to:
Posts (Atom)